Demo 1 - DD at Computer

Here are the memory files for a video processing workflow for converting raw chroma key green or blue screen footage into Tron-like colors and effects.
GIMP and Scripts
- Install GIMP 2.10 (Windows, Mac Apple Silicon, Mac Intel) - GNU Image Manipulation Program
- Save tronify_image.py - the GIMP plug-in I maintain
- Save frames-1080p.zip - sample frames for coloring
Unzip frames-1080p.zip into a folder called "frames-1080p".
For Mac, make tronify_image.py executable and copy into the GIMP plug-ins folder at:
~/Library/Application\ Support/GIMP/2.10/plug-ins/.
In Terminal:
$ chmod 700 tronify_image.py
$ cp tronify_image.py ~/Library/Application\ Support/GIMP/2.10/plug-ins/.
For Windows, copy tronify_1_image.py into the plug-ins folder at:
C:\Users\your_account\AppData\Roaming\GIMP\2.10\plug-ins\.
Using Tronify...
Run GIMP and open any image from the "frames-1080p" folder.
Under the Filter menu, select Tronify...
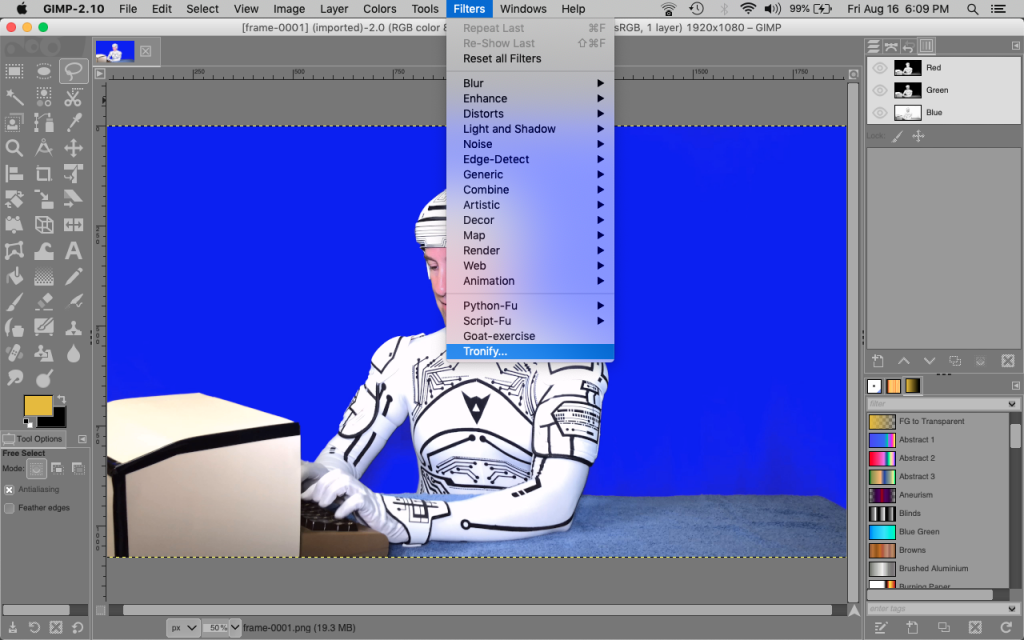
You can make the circuit lines any color you desire! Just provide your color combination in RGB format. Use Chroma Out = 0 to render onto a transparent background, 1 for a green screen, and 2 for a blue screen. Blue-ish lines should not use a blue screen, likewise green-ish lines should not use a green screen.
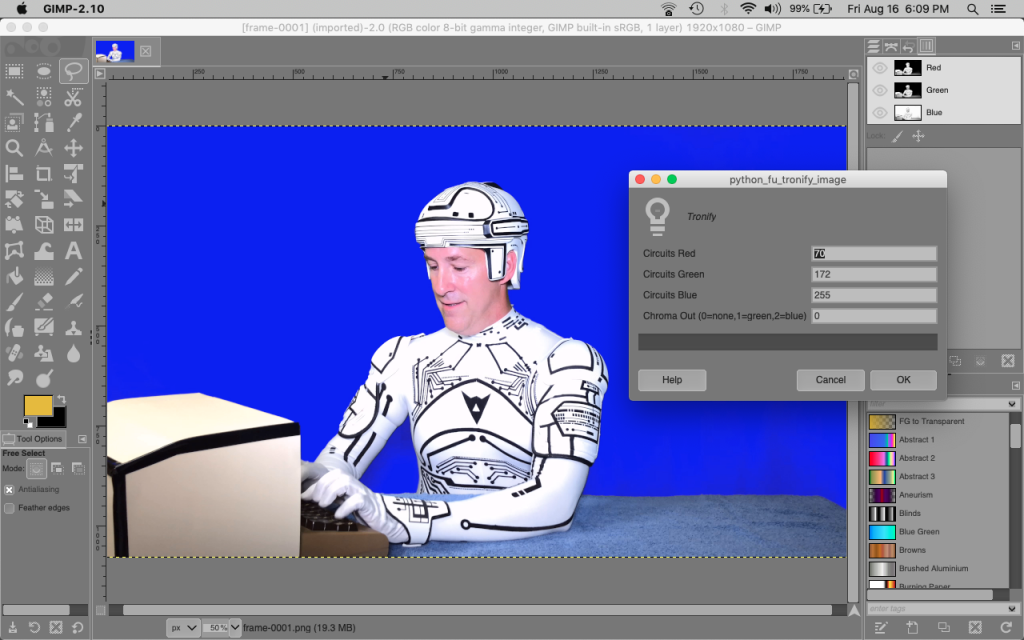
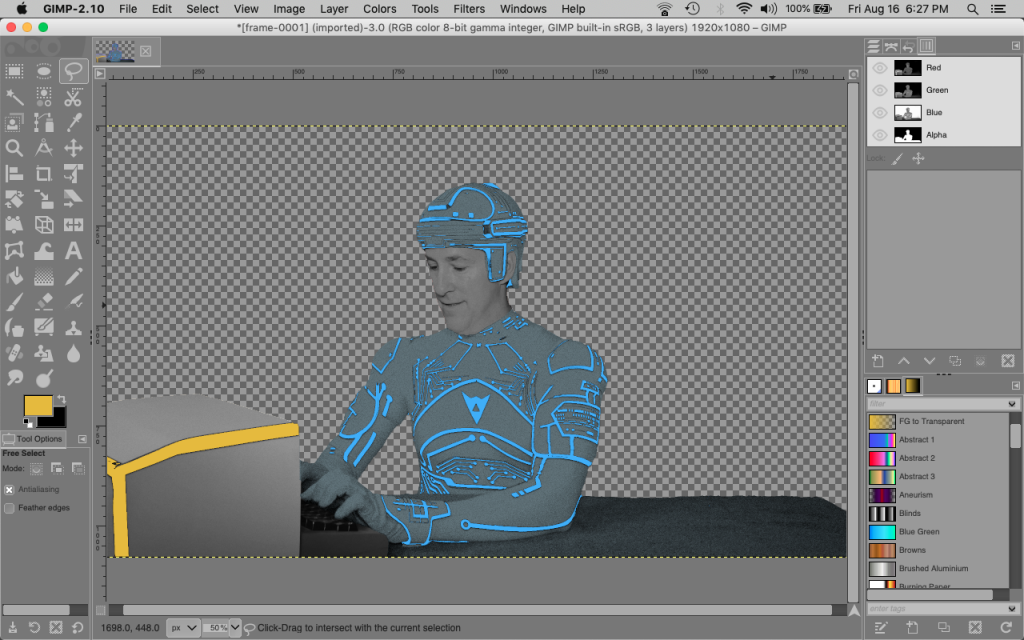
When the plug-in finishes Tronify-ing the image, it will look something like this:
Automating Tronify
The plug-in above is designed to operate on a small group of images one at a time. This isn't practical for processing thousands of frames from a full video. In order to automate this process, I created tronify_dir.py, which is a command-line version of the GIMP plug-in, and tronify.sh, which is a Bash script for use from a Terminal on Mac. The Bash script invokes the plug-in.
- Save tronify.sh
- Save tronify_dir.py - save to same folder as tronify.sh
Let's say you saved both tronify.sh and tronify_dir.py to your Desktop folder, along with the frames-1080p folder as well. To process all the images, from a Terminal, run:
$ cd ~/Desktop
$ chmod 700 tronify.sh
$ ./tronify.sh -t frames-1080p
This will generate a couple of "done" frames inside the frames-1080p folder. Look for files with "done" in the name. The -t means test mode, which will just do a couple of frames so you can look at the output and see if it looks good.
I use -t to save time, allowing me to examine the "done" frames and to make adjustments to the plug-in code to fine tune things. Then, once I'm happy with the output, I run it without the -t, which will process all the remaining frames:
$ ./tronify.sh frames-1080p
Or, for 10 threads...
$ ./tronify.sh -n 10 frames-1080p
Lastly, to reassemble the processed frames into a video, use the popular program ffmpeg. Here's the command to turn the frames above into a video:
$ ffmpeg -f image2 -r 29.97 -s 1920x1080 -i frames-1080p/frame-%03d.done.png -y -pix_fmt yuv420p -crf 27 output.mp4
This creates a video called "output.mp4", which you can play to view your results!
The methods in tronify_dir.py that are named like "f_xxx_yyy" are the methods that set values for each frame # from xxx to yyy. Experiment with those to change the effects themselves. For example, changing:
    def f_151_230_full_power(self):
        self.linesColor = (255, 255, 255)
        ...
to
    def f_151_230_full_power(self):
        self.linesColor = (255, 0, 0)
        ...
will result in red circuitry at "full power".
END OF LINE